Saul Leiter’s Street Photography tips

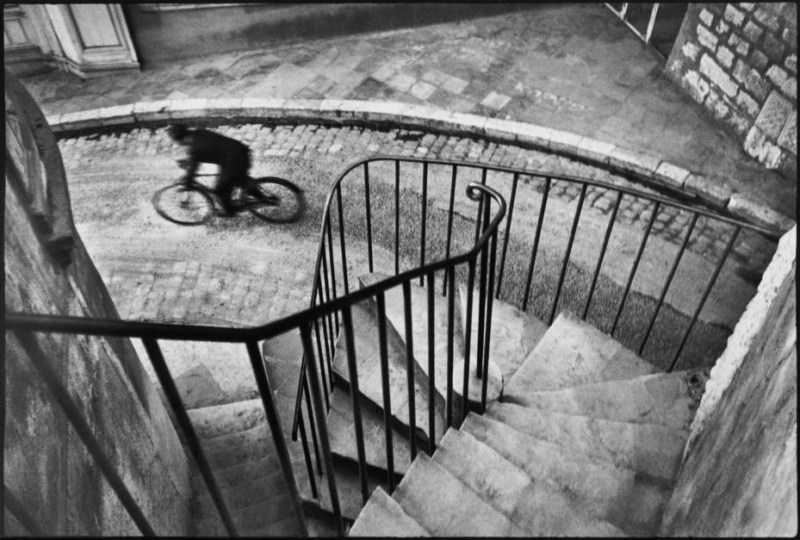
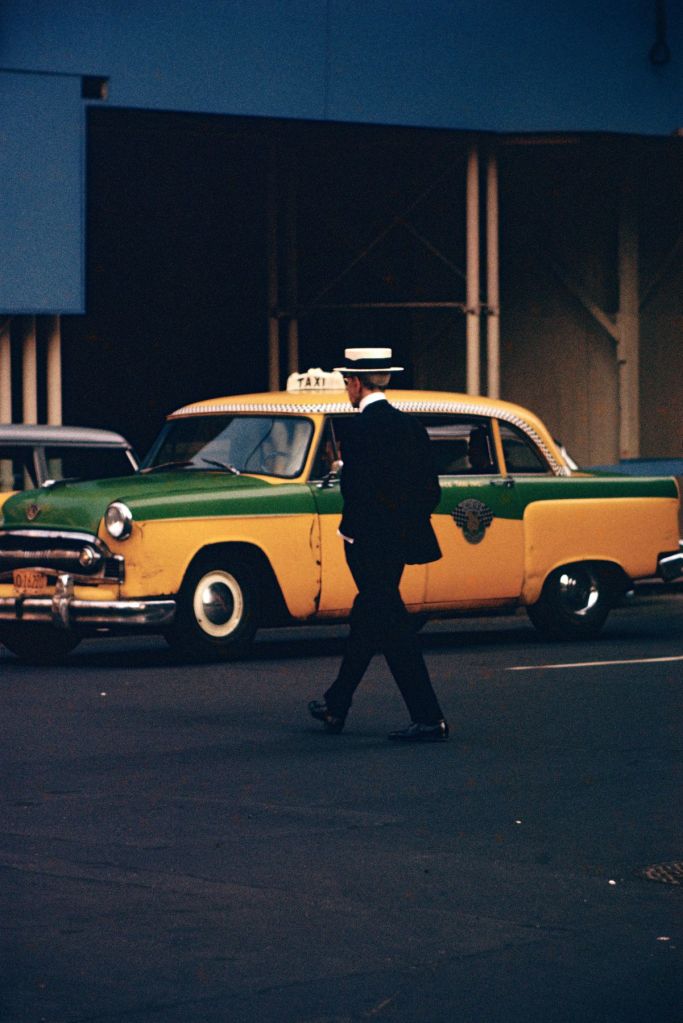
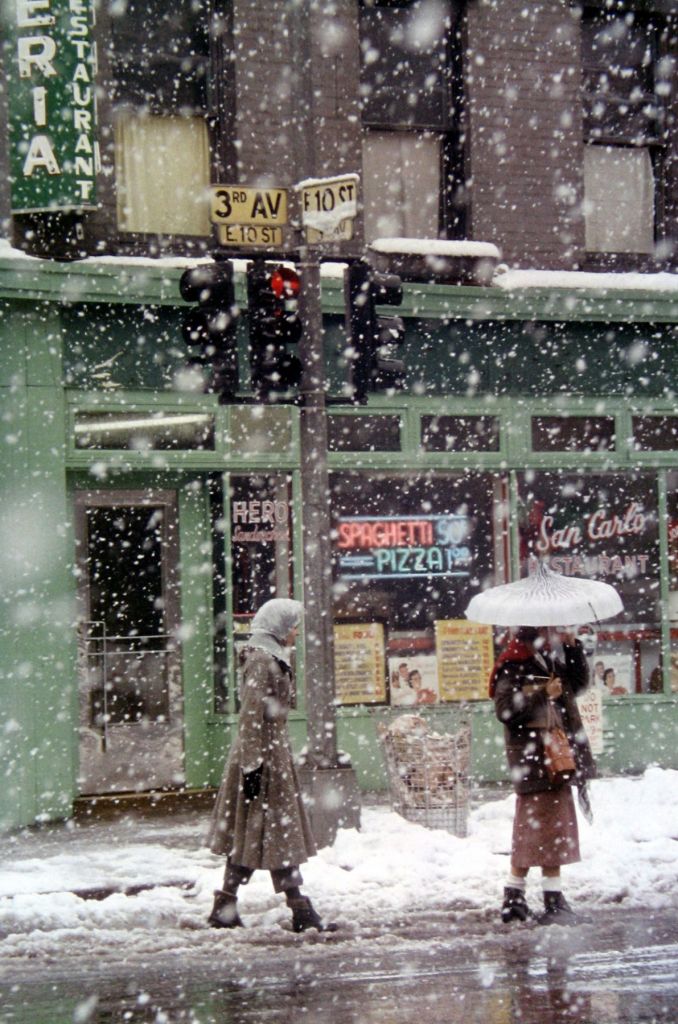
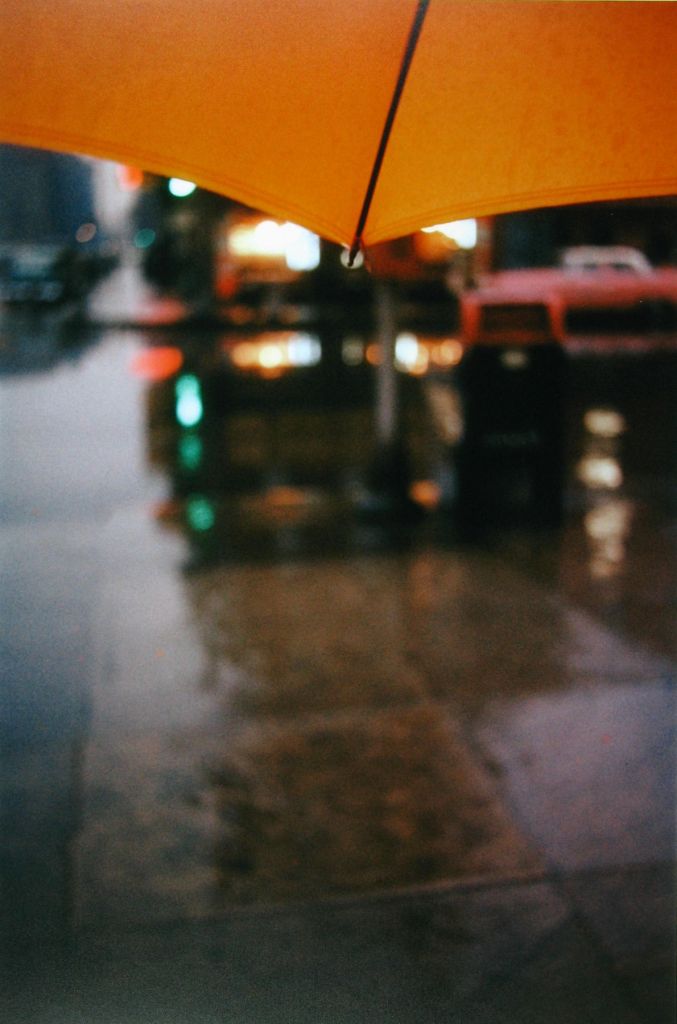
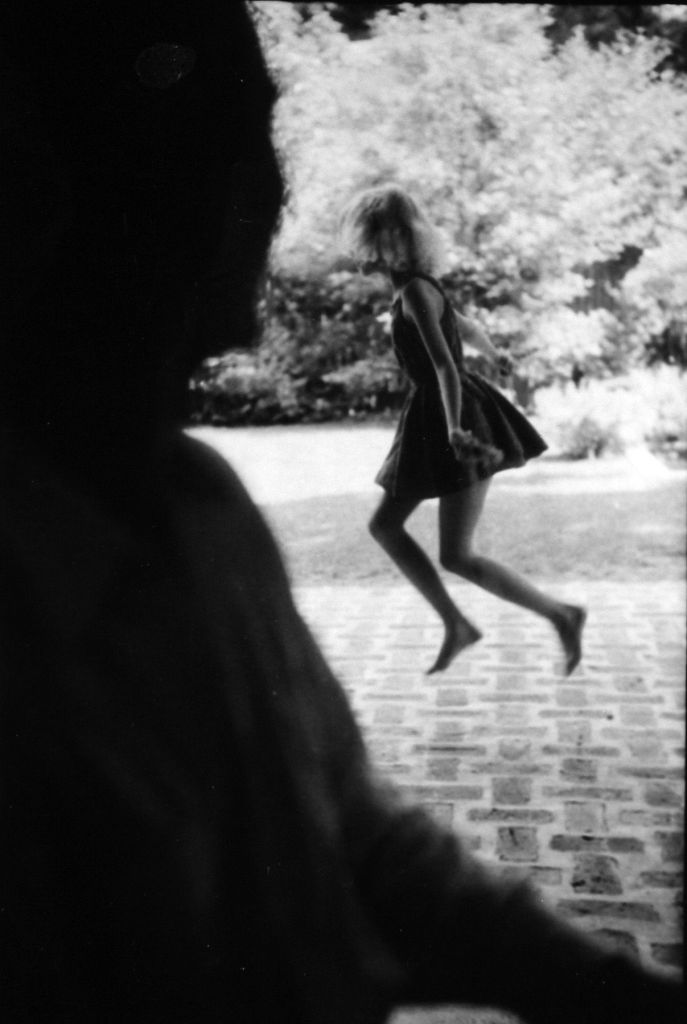
I can’t recall the time when I discovered Saul Leiter’s work. I guess I was searching for the top ten street photographers on the Internet. But I didn’t look into it too much after hearing this. I then started to further research on Saul Leiter and admired not only his pictures, but his understading of life. He was a photographer who brought inspiration from fashion,street photography and diferrent forms of art. He started as a painter and was inspired by colour, forms and the camera as a medium to turn nature into his very own style. Leiter was introduced to photography by painter Richard Pousette-Dart and, although he started in black and white, he began experimenting with colour photography in the 1950s at the period when the medium was in its early stages. He tried experimenting with a number of lenses, he was well known for having a perspective of telephoto framing, and a 150 mm lens in particular. This isn’t a focal length used by other street photographers, but he used it to create a compact perspective that painterly made his work look.

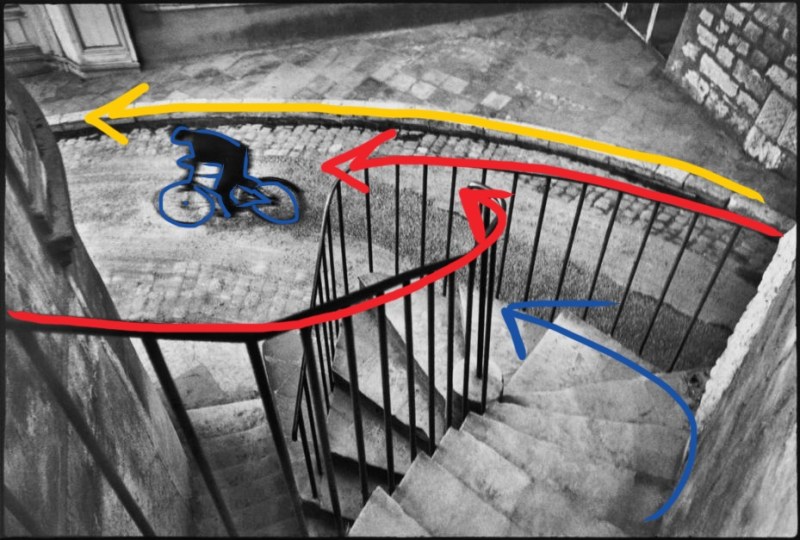
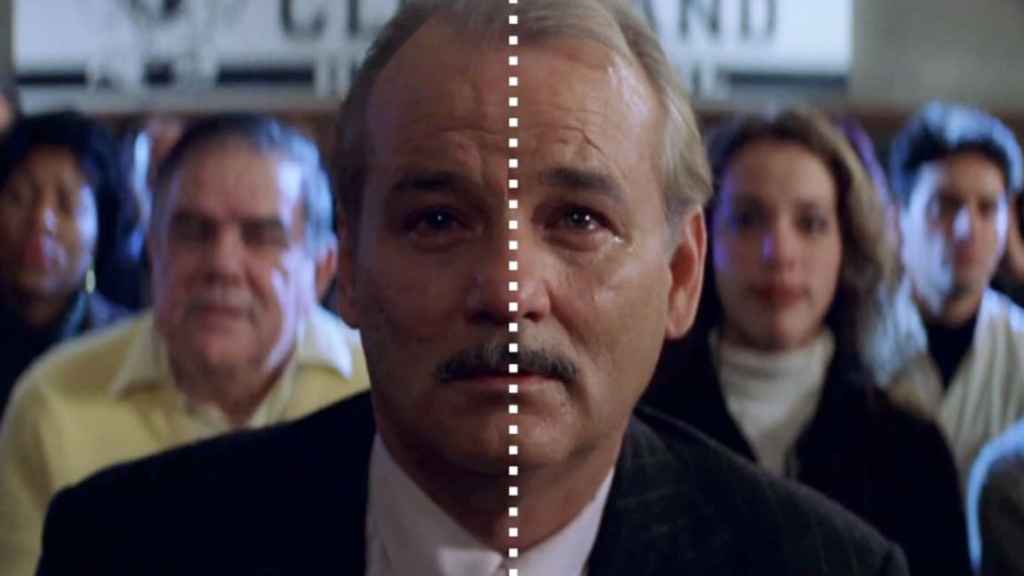
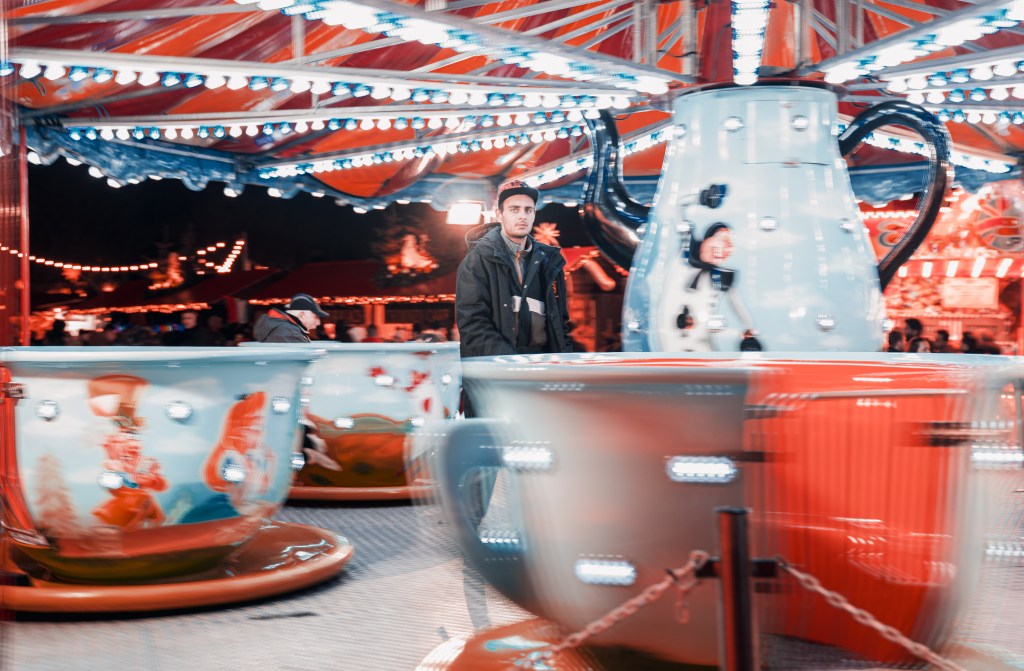
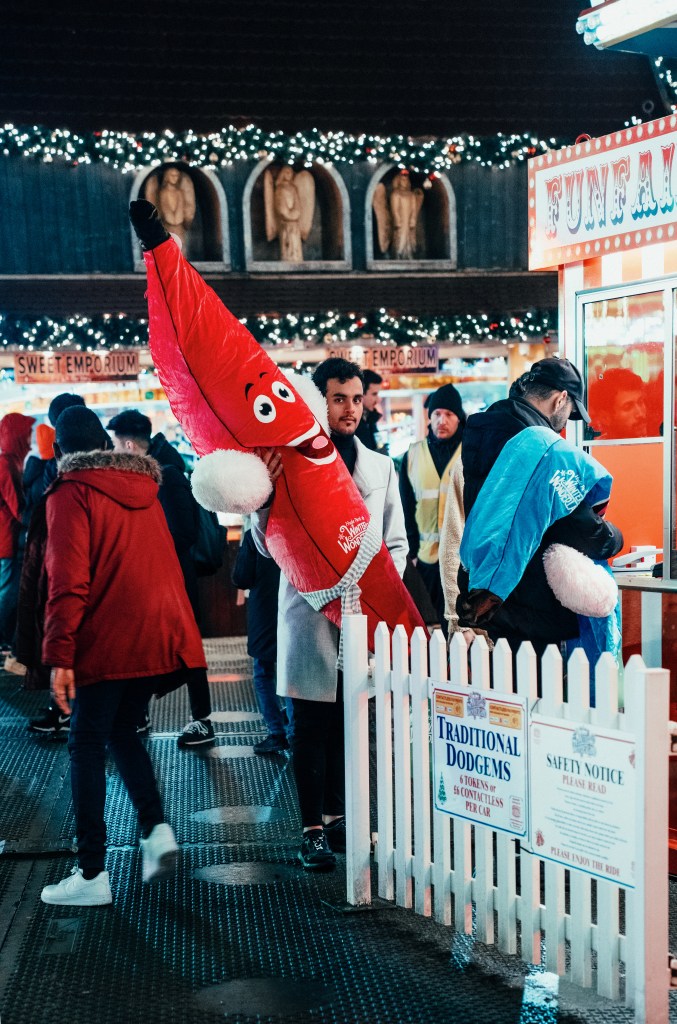
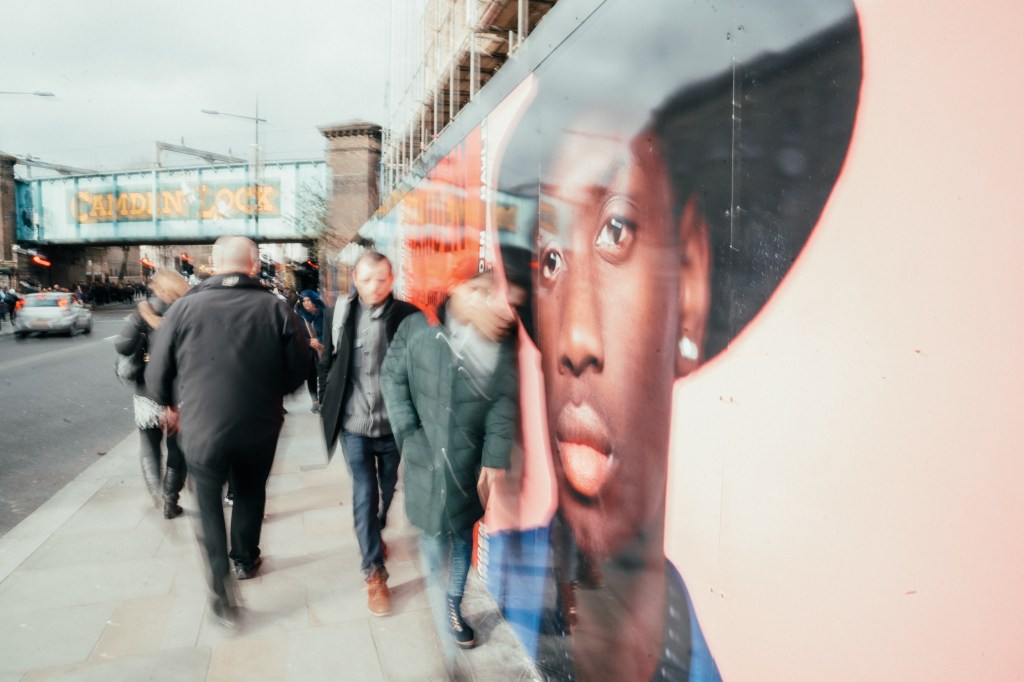
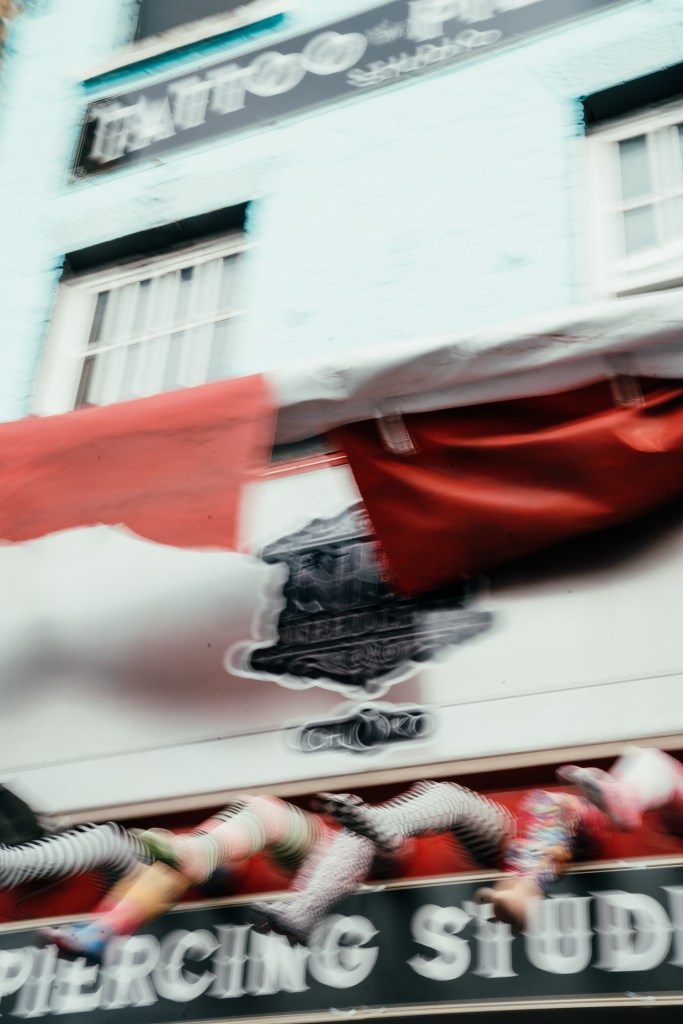
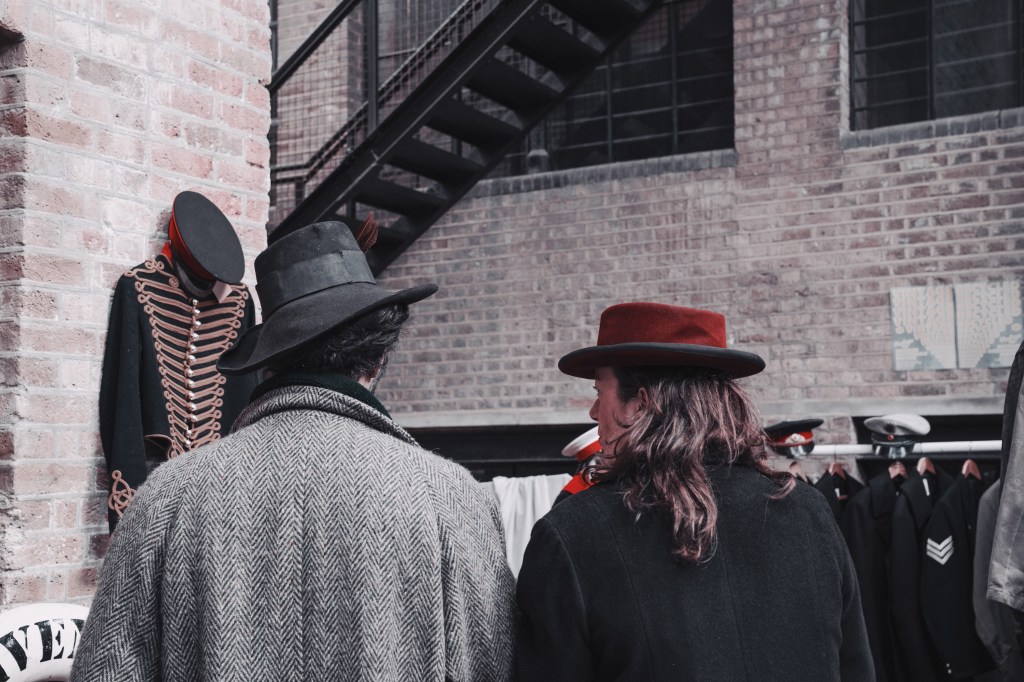
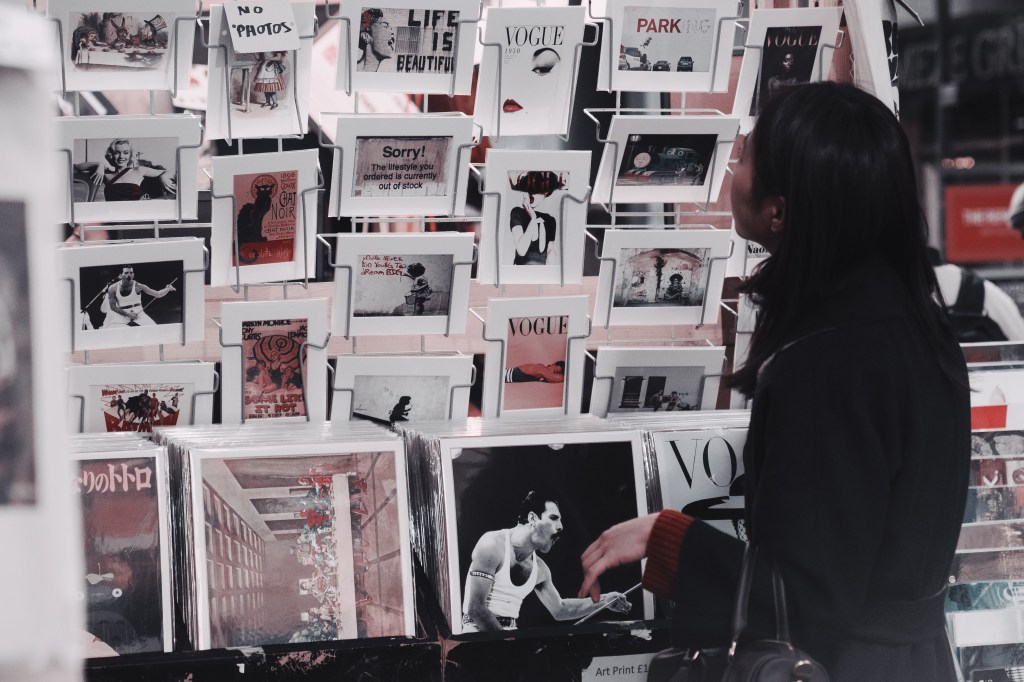
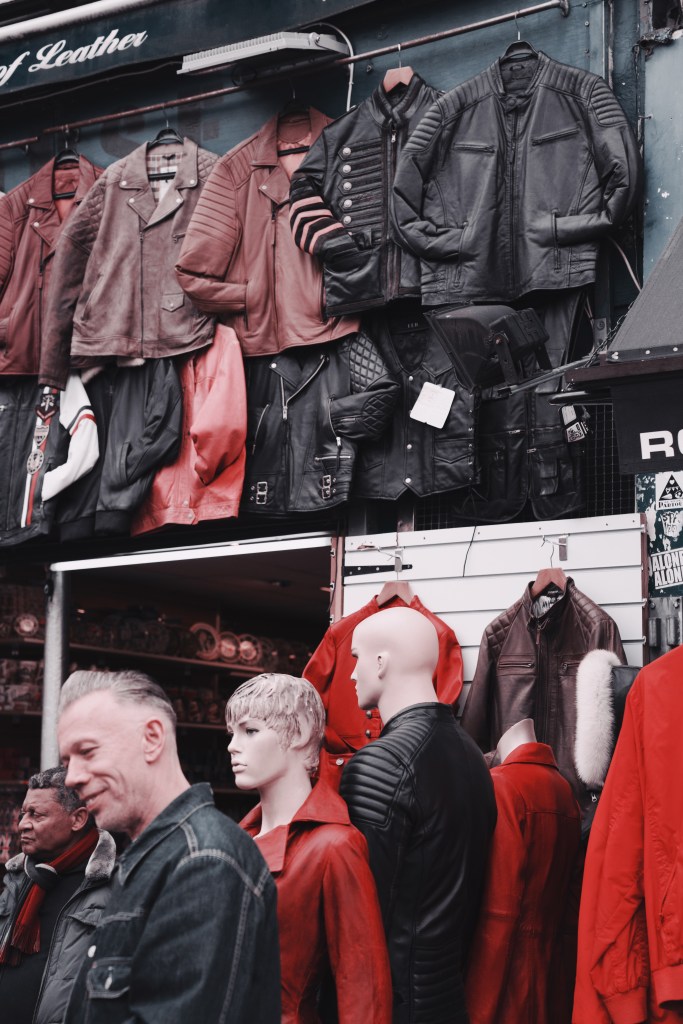
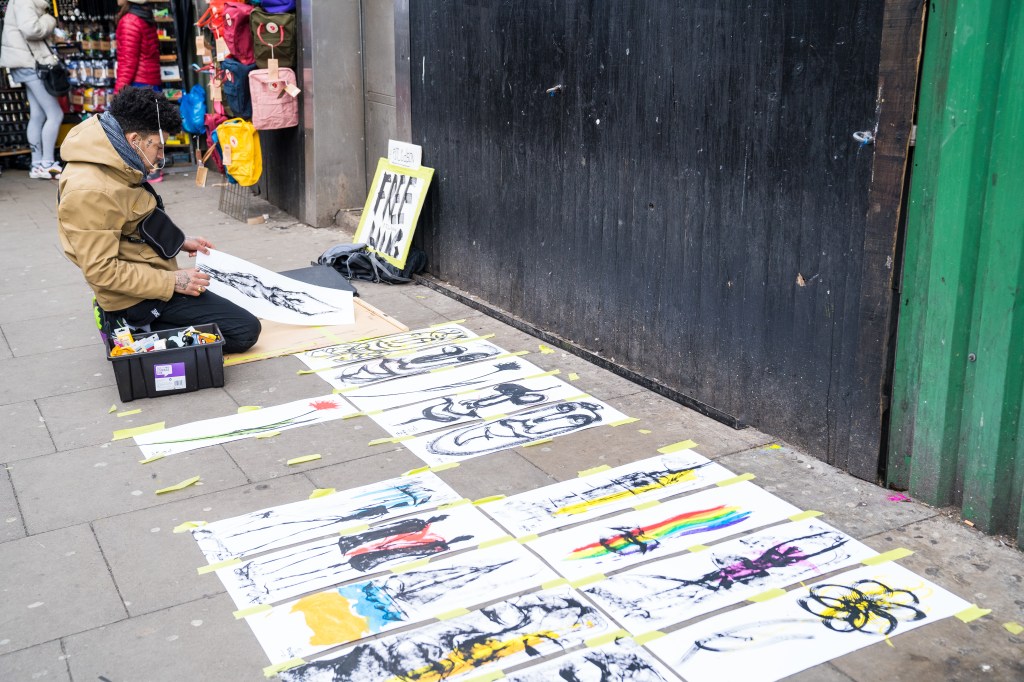
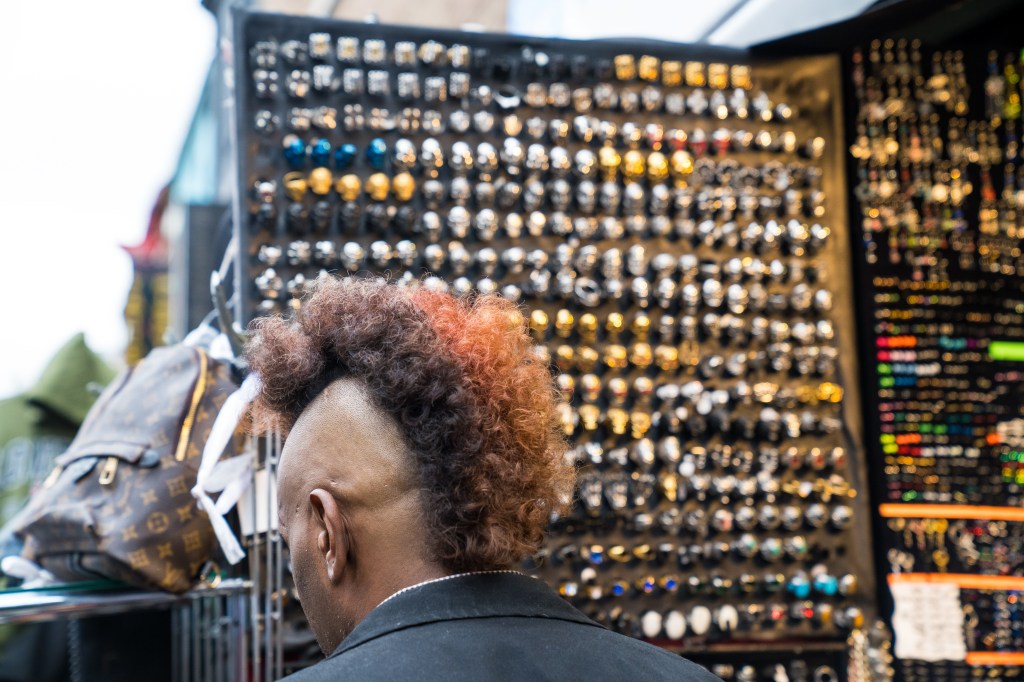
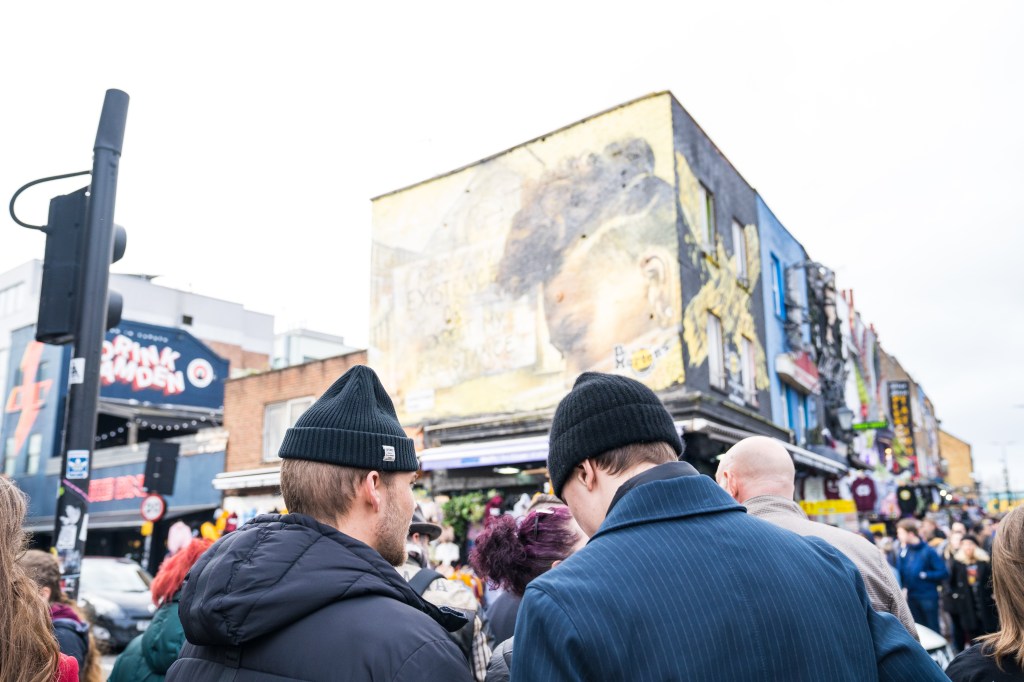
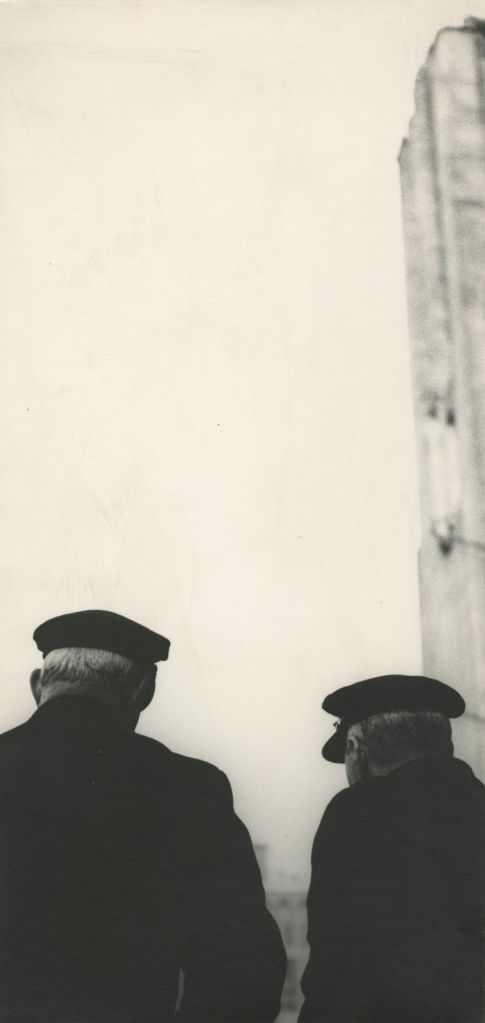
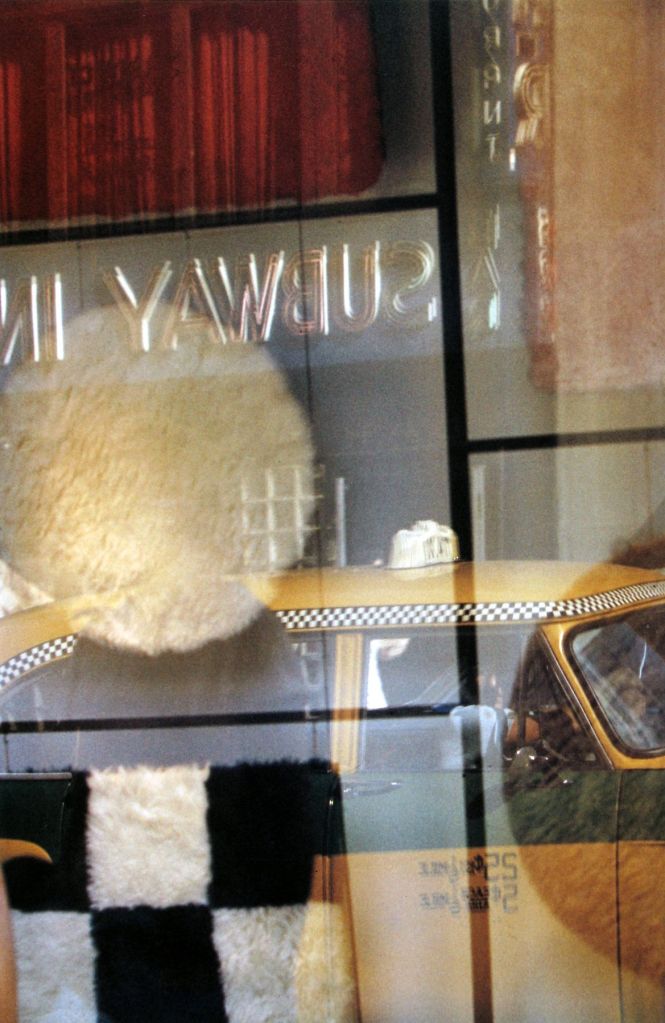
  1. Objects and people. Although using camera techniques such as shallow field depth and framing to achieve so, he often used basic techniques. Seek not to reveal faces, shoot through items or crop – both generate a feeling of intrigue and hide parts of a scene.
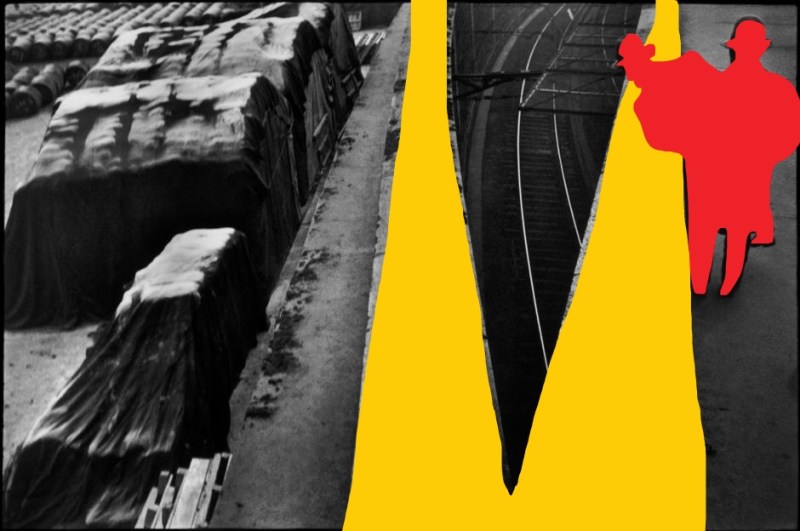
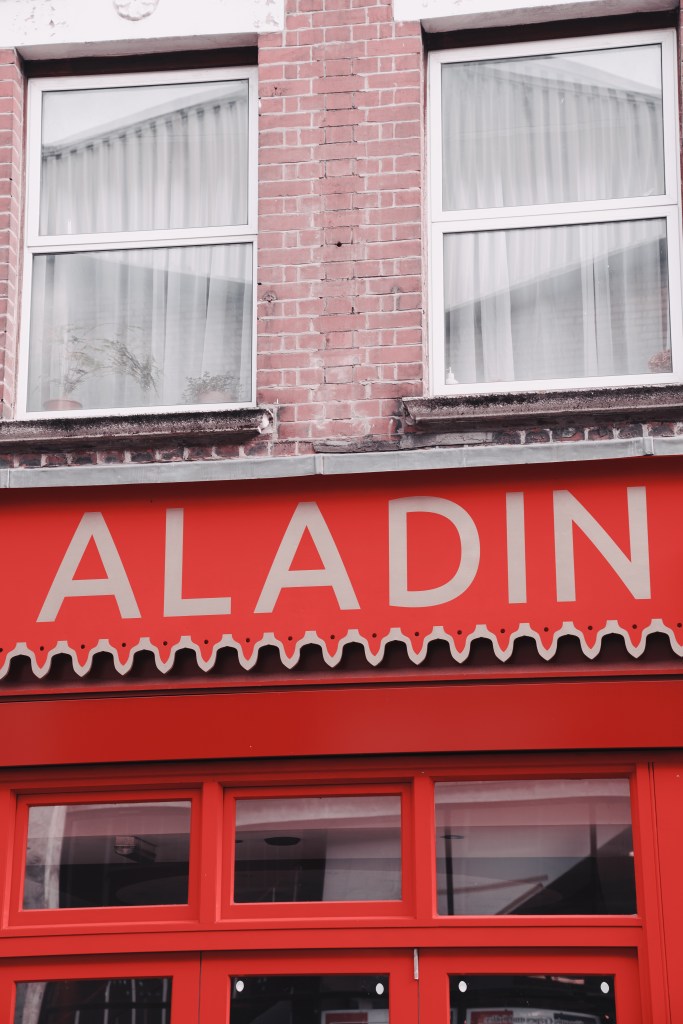
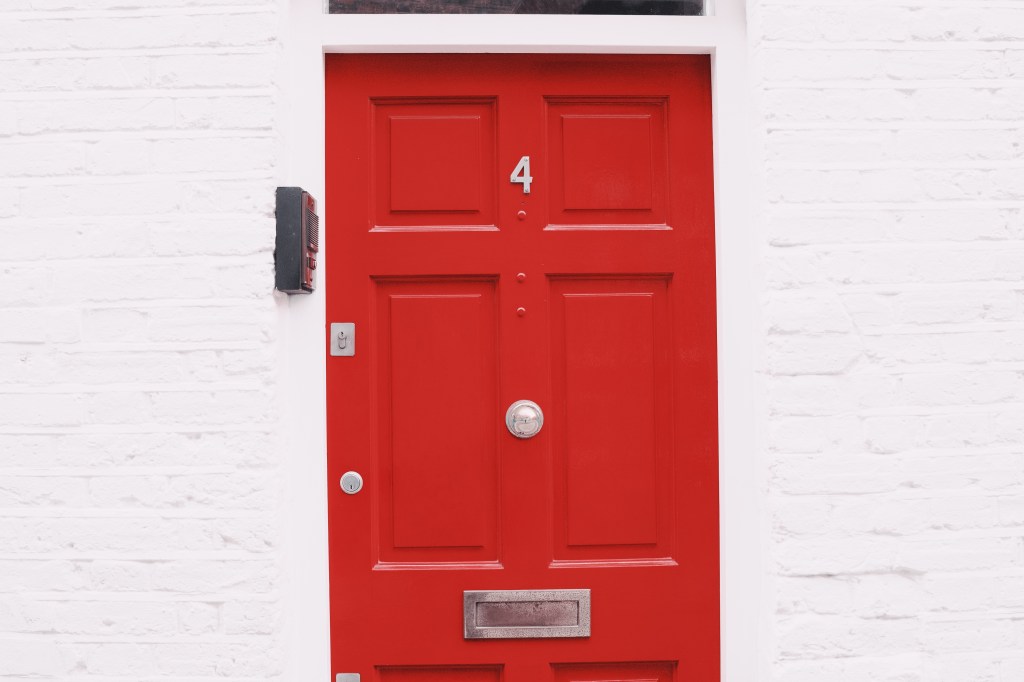
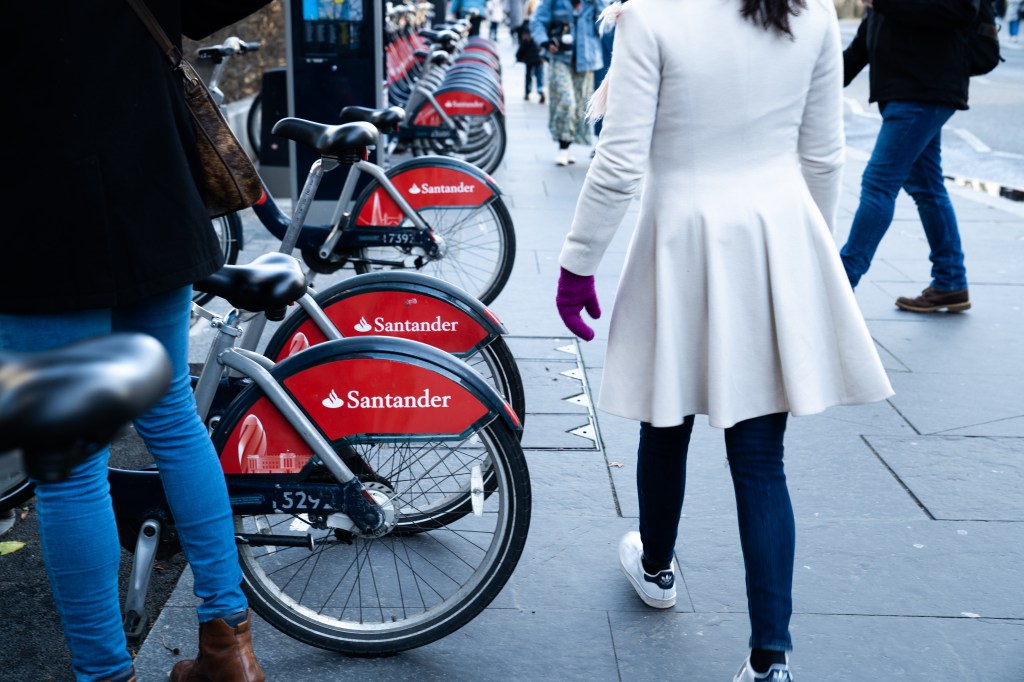
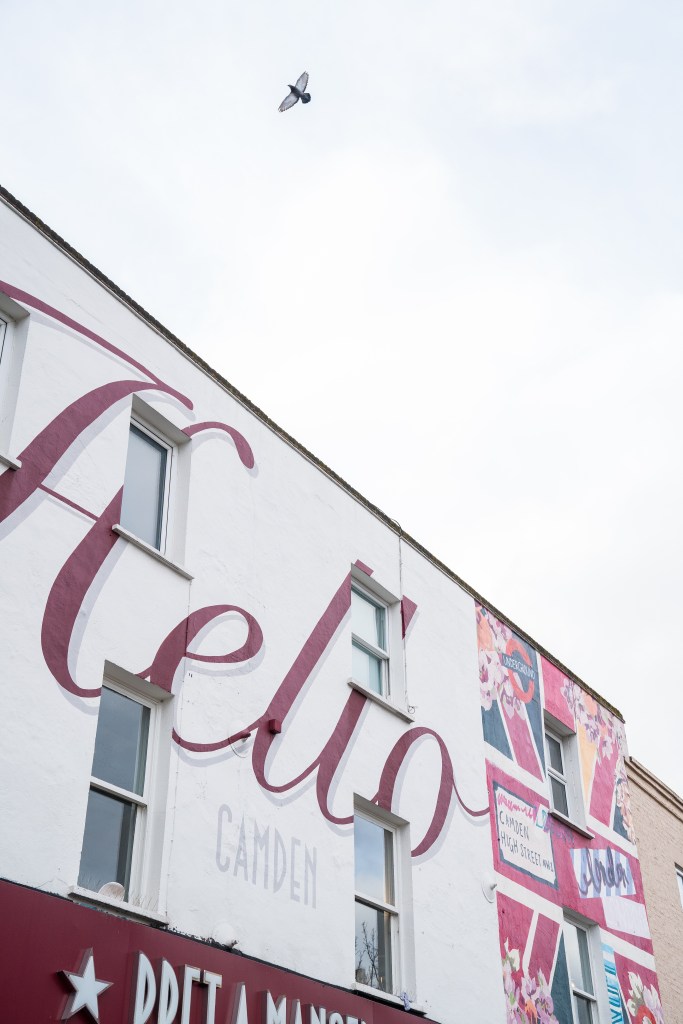
  2. Cropping. As photographers, we are used to making the image complete. We’re cautious of providing all the relevant information of a picture. Flip the idea inside out, and you often have what Leiter did cleverly, crop things out, or leaving portions of a scene out intentionally. The outcome tells a different story or a reaction.
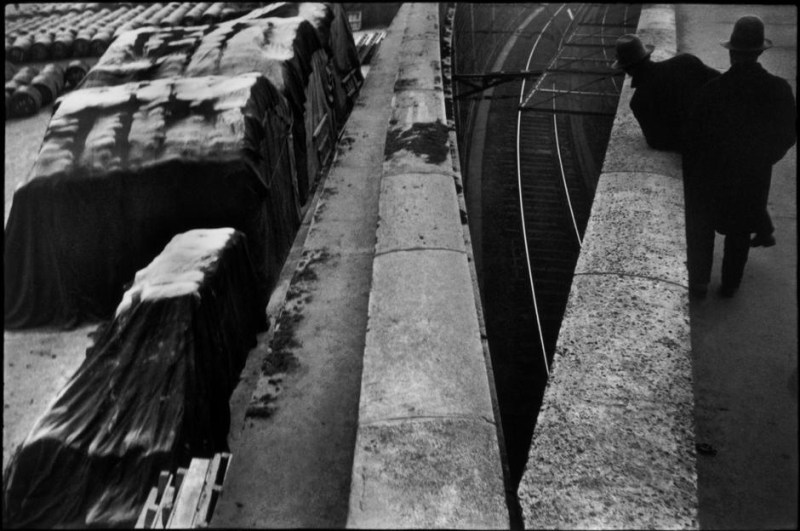
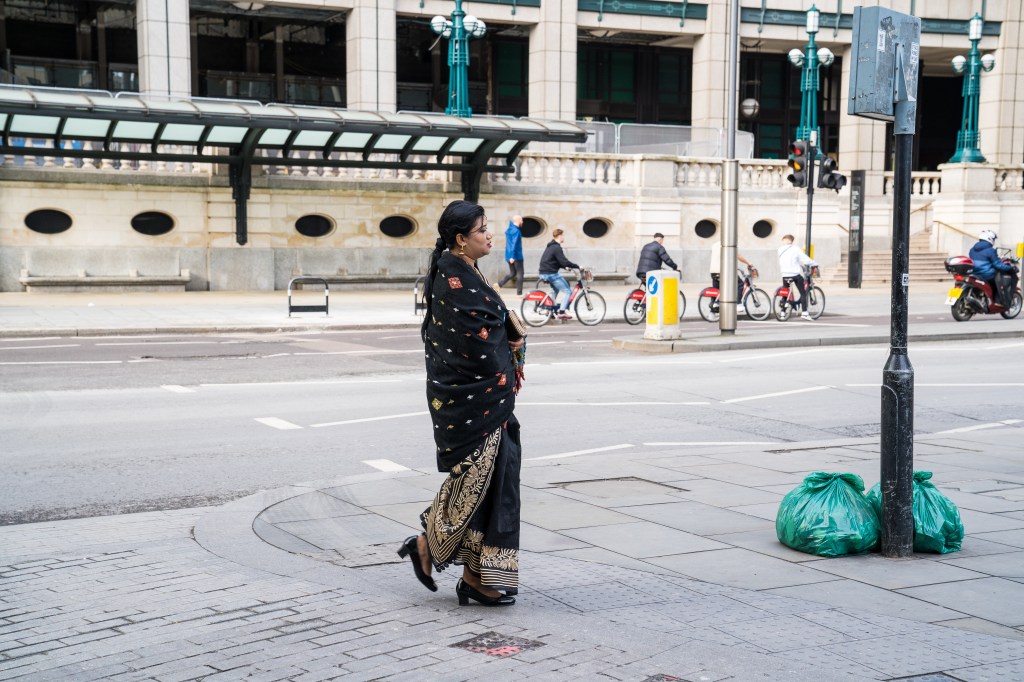
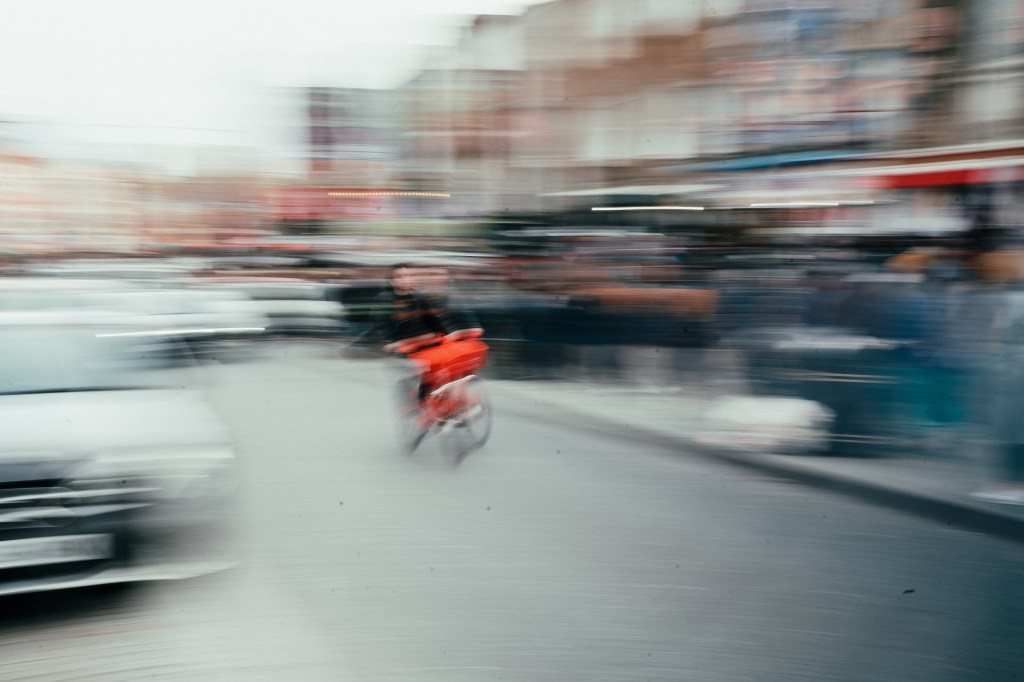
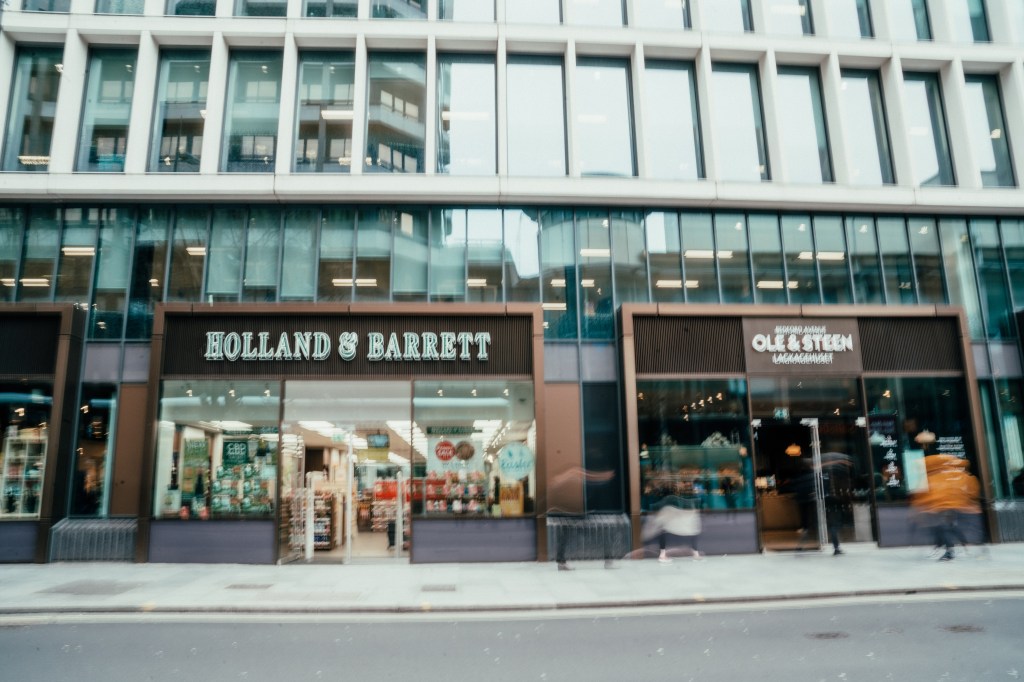
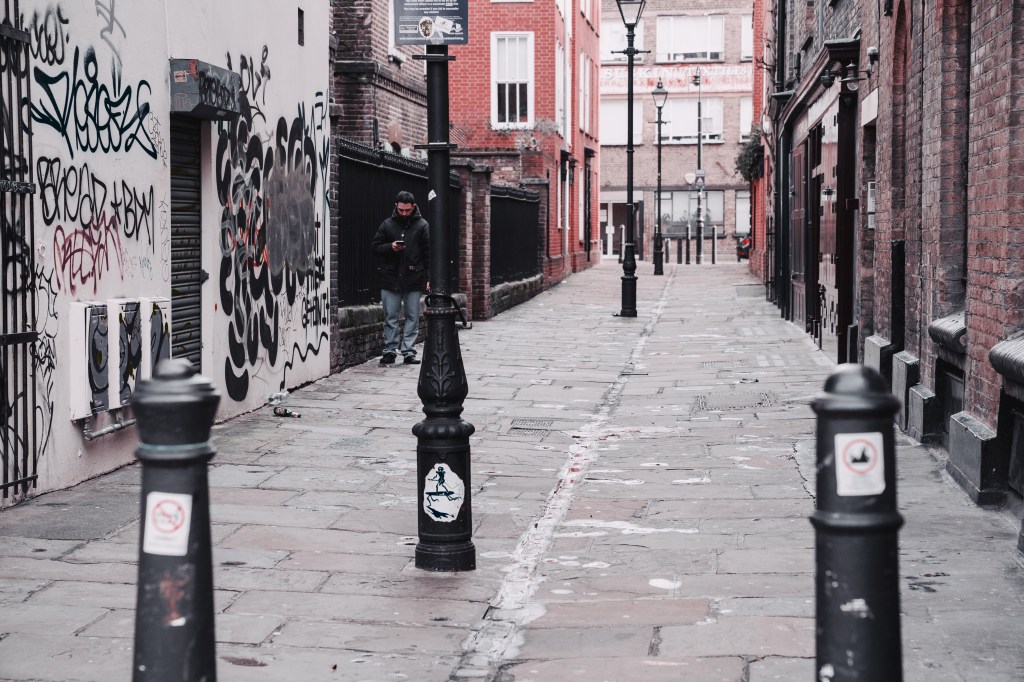
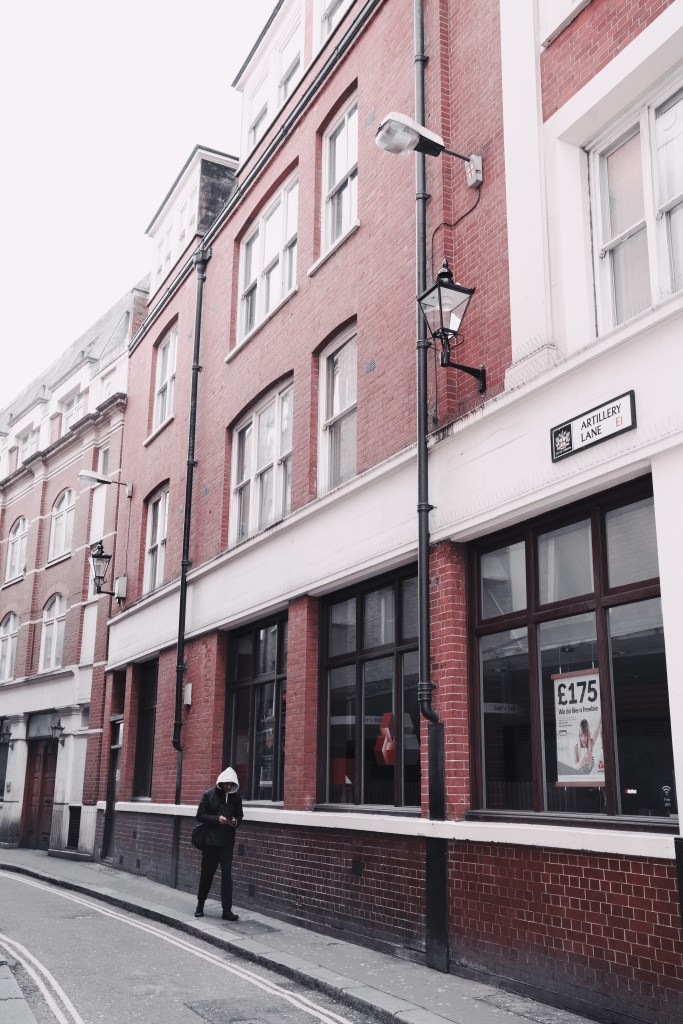
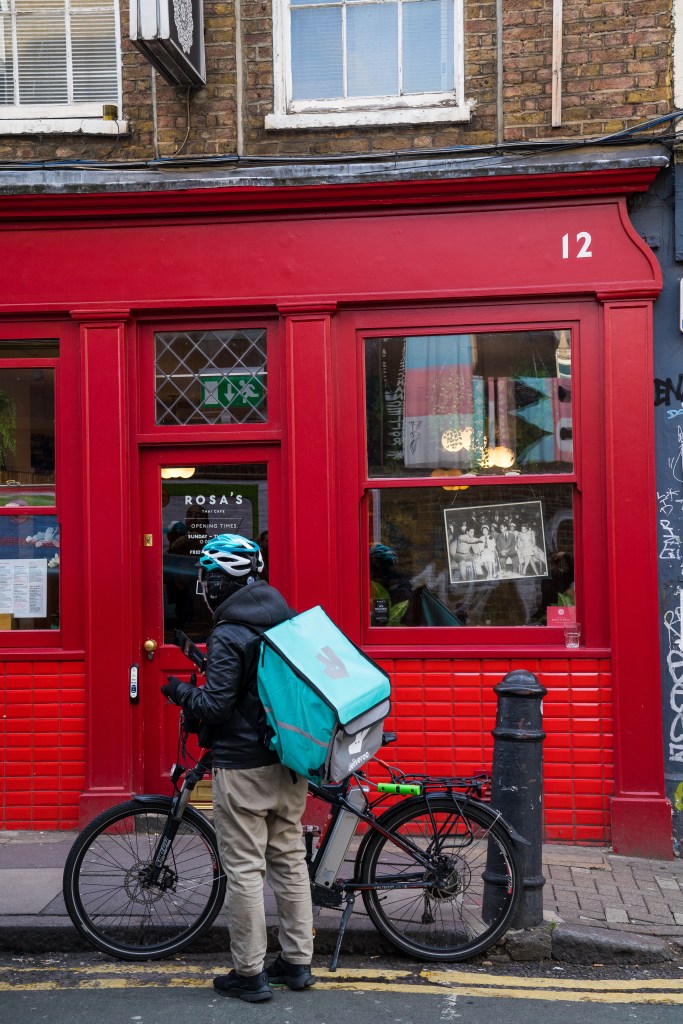
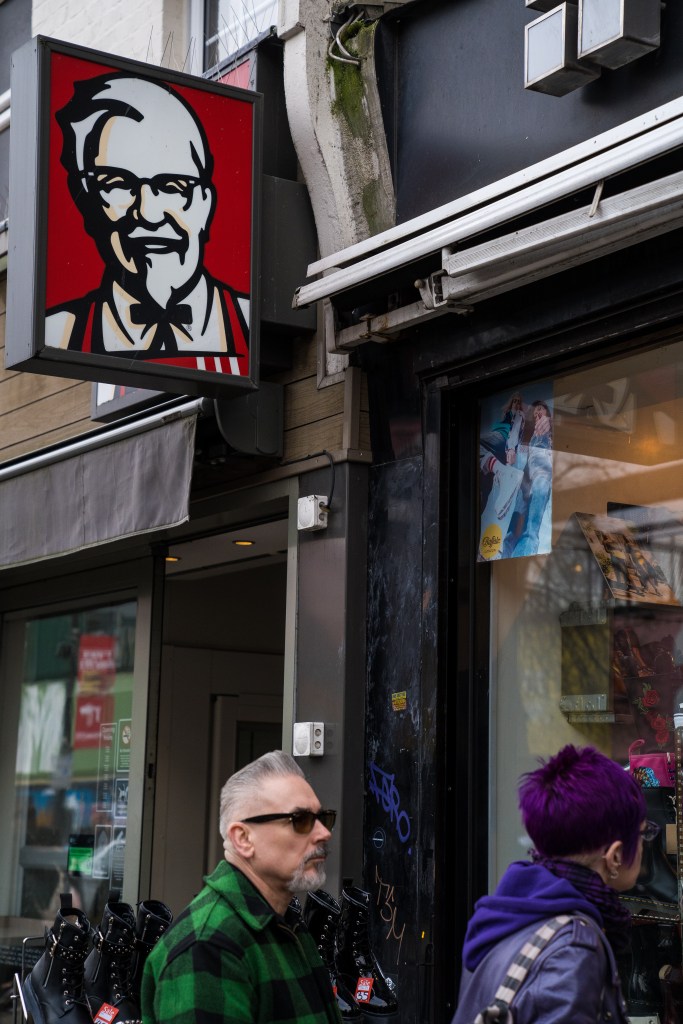
  3. Use Telephoto lens. I’ve never been a fan of using street-photo lenses. Usually, as I take pictures of people, I find it to be intrusive, and a little shy. Yet my opinions changed once I started to see Leiter’s work. His photos are nothing short of subtle. Most of his shooting on the street is taken with a relatively long of focal length lens that compresses his scenes.
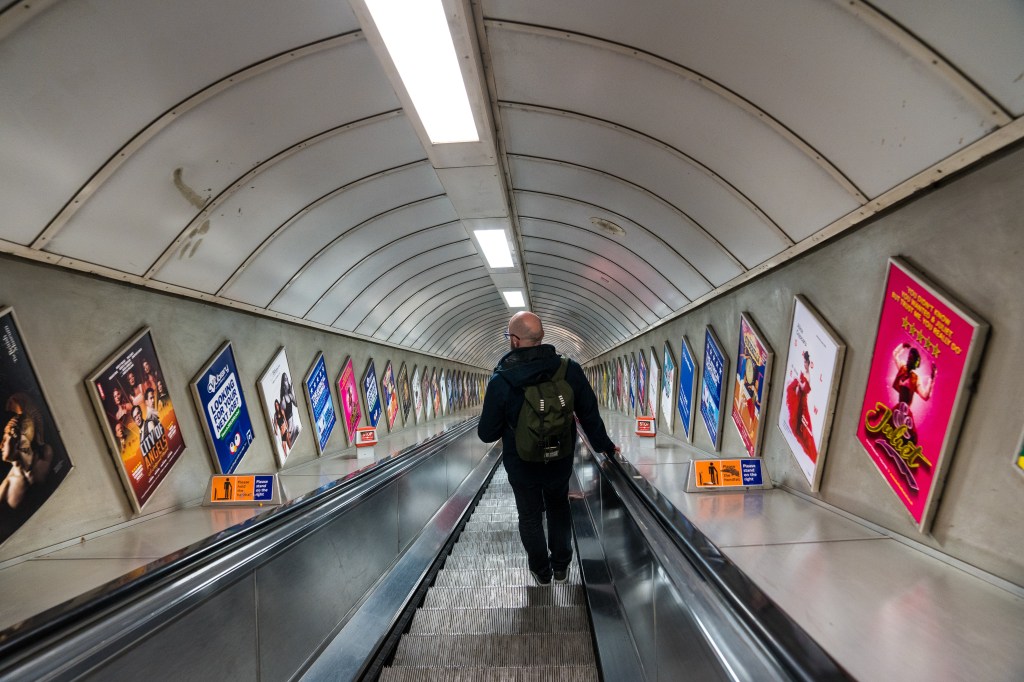
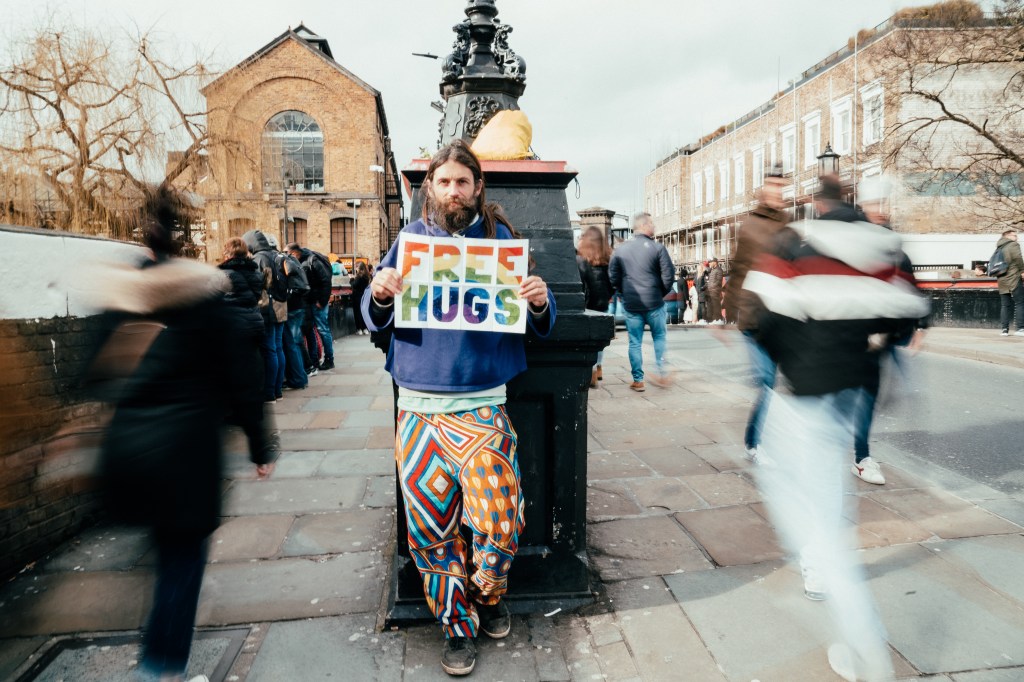
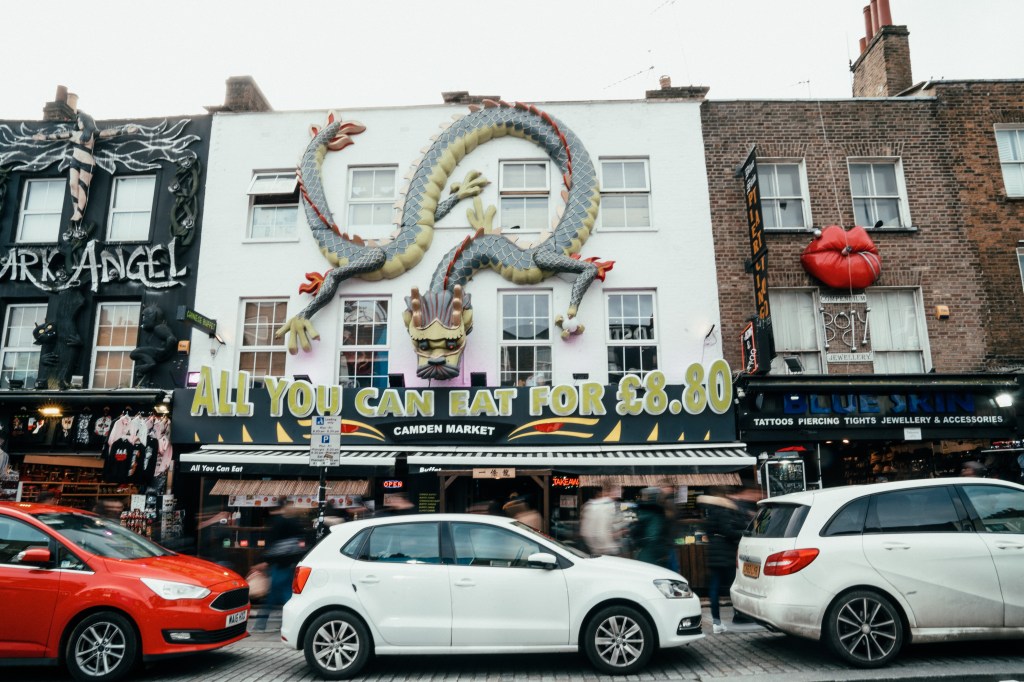
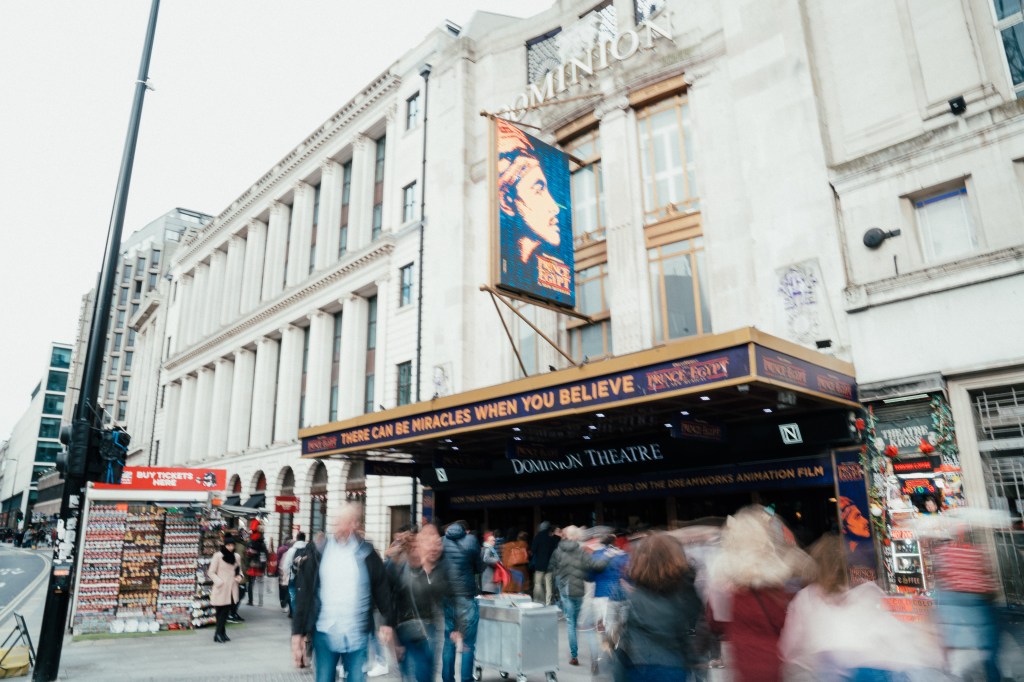
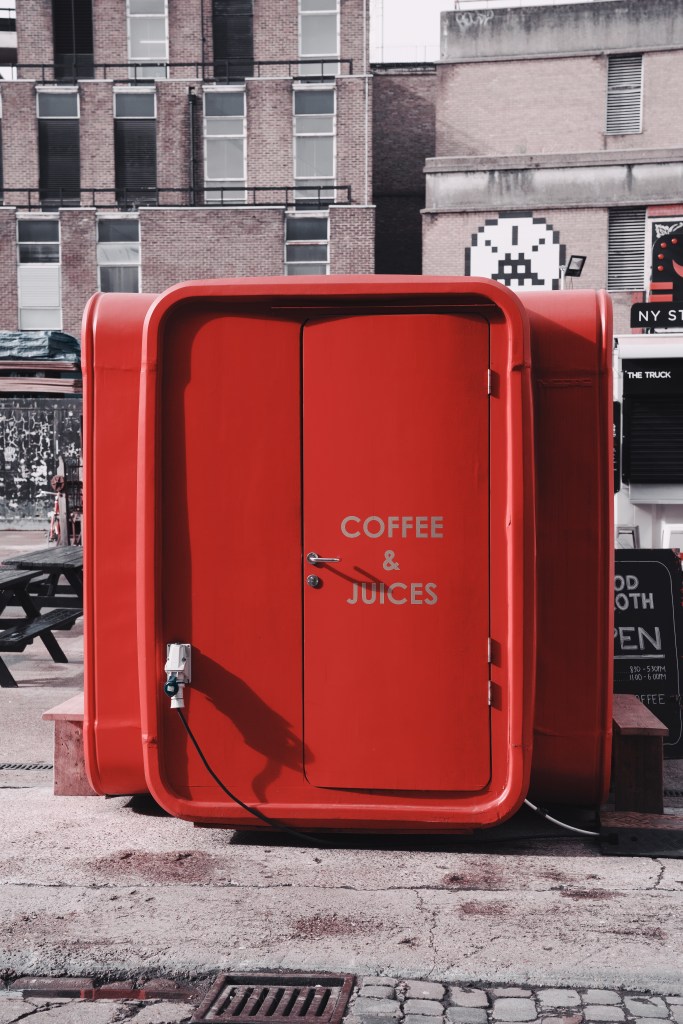
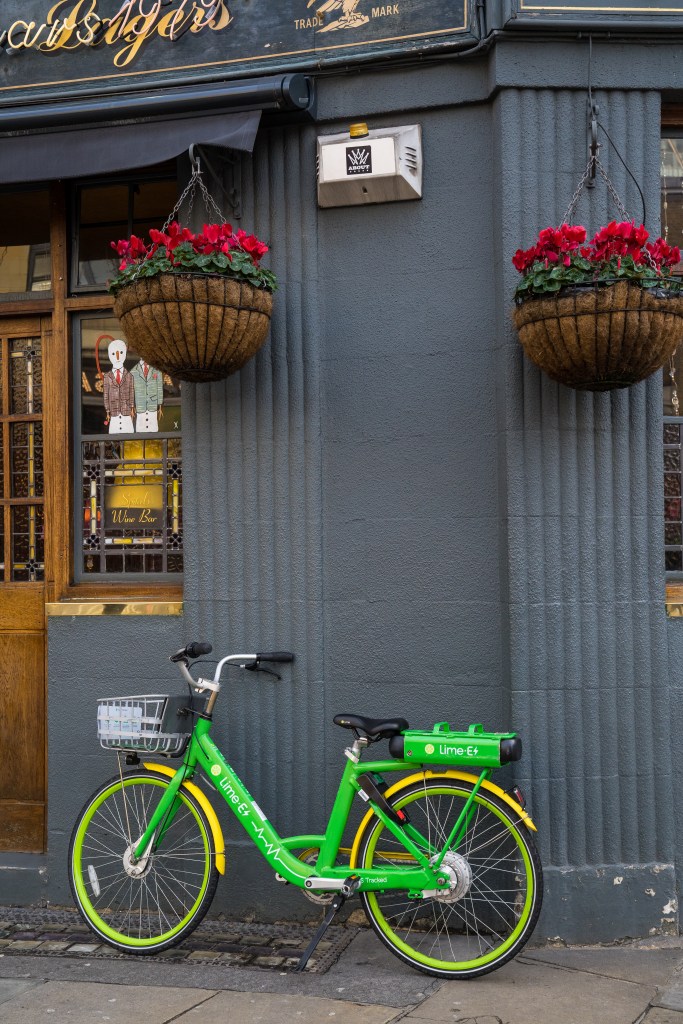
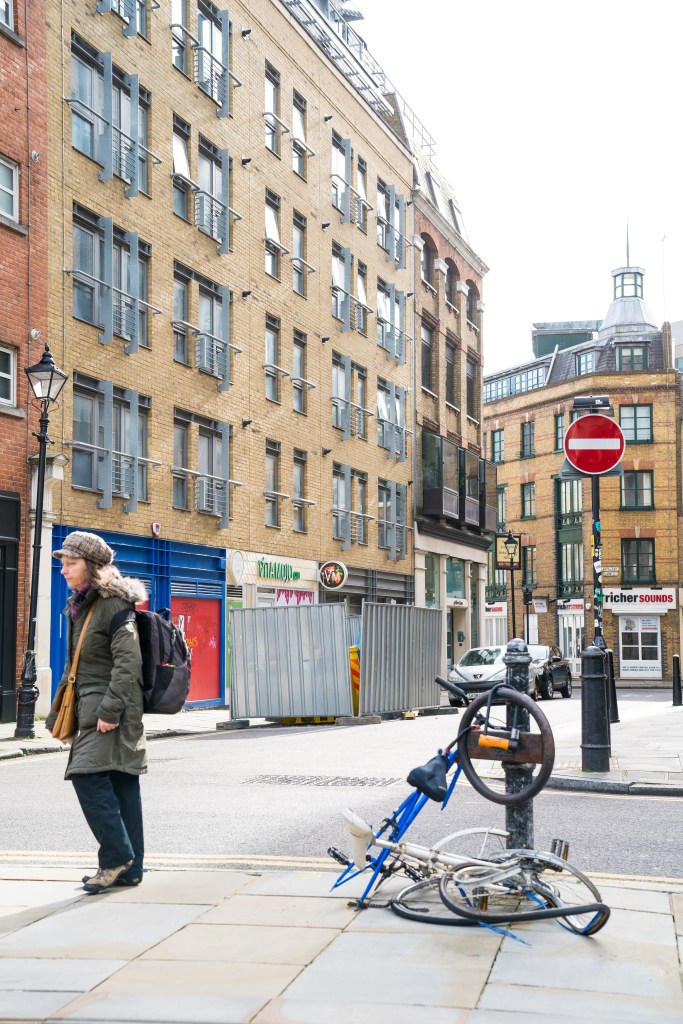
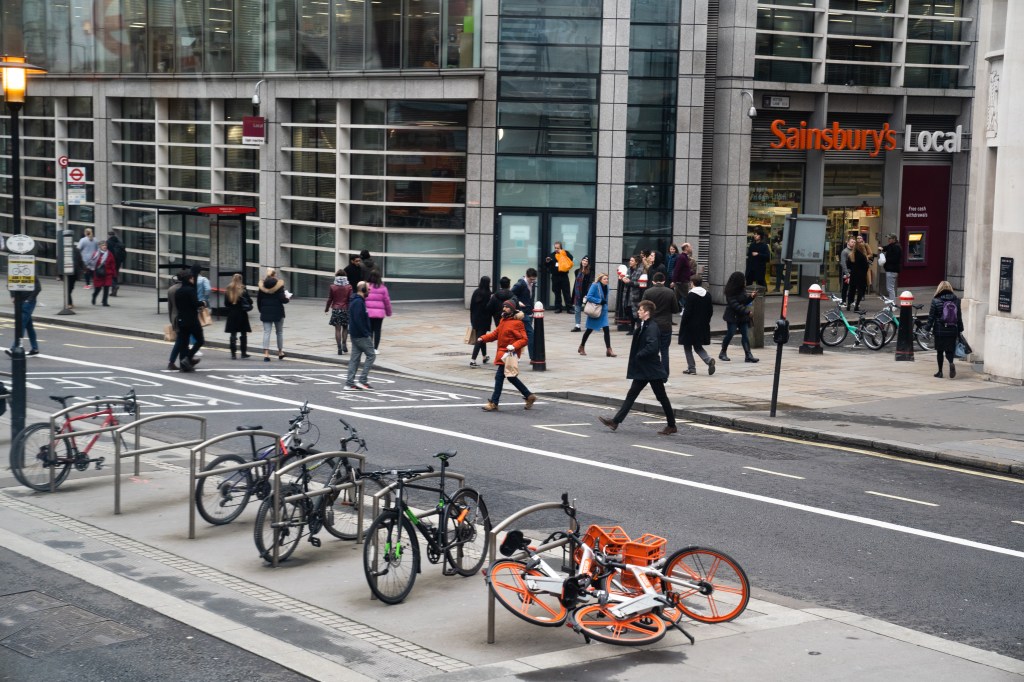
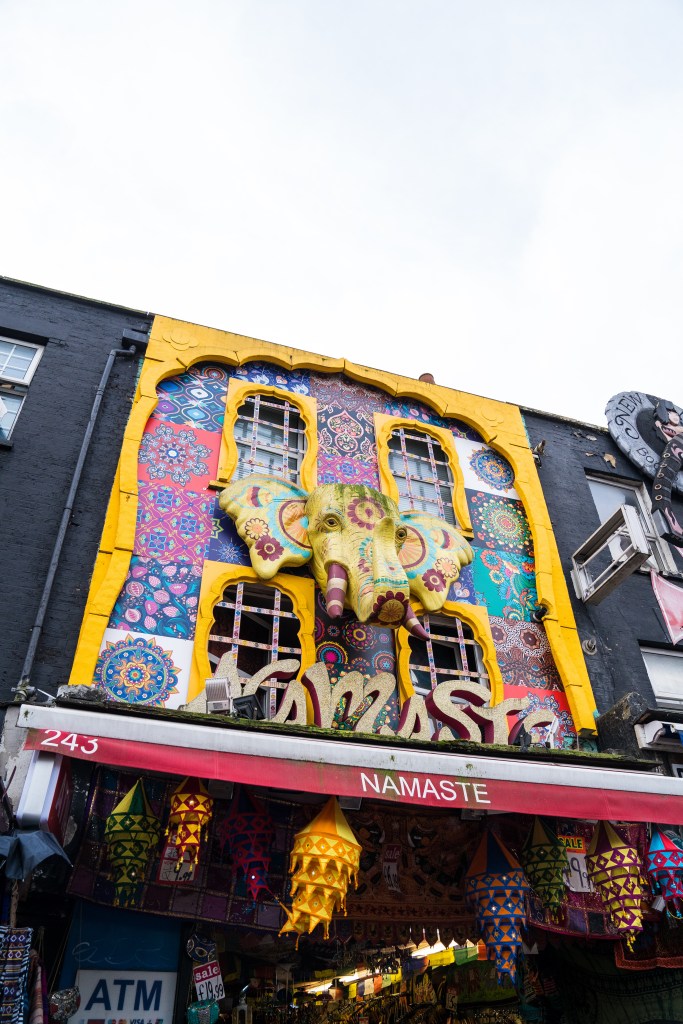
  4. Observe the environment. I believe that the best street photographers are the ones that observe and understand their environment. The world’s best street photographers tend to be enthusiastic who are curious and see the environment in a special way. Know that no matter how boring you think your community, area, or life is, you can photograph a lot of fascinating things.
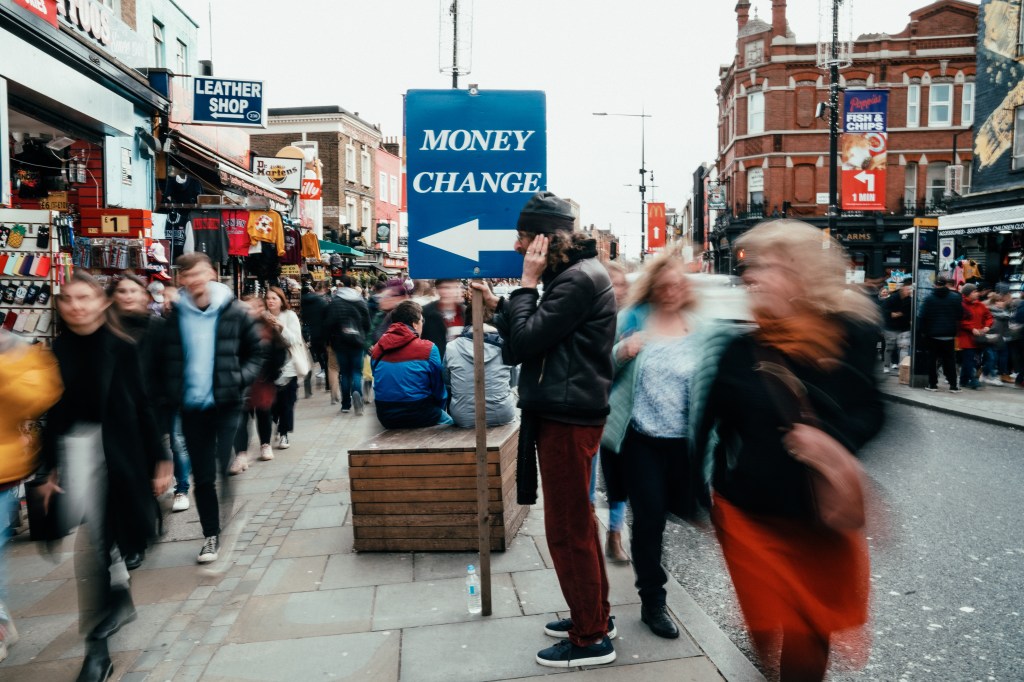
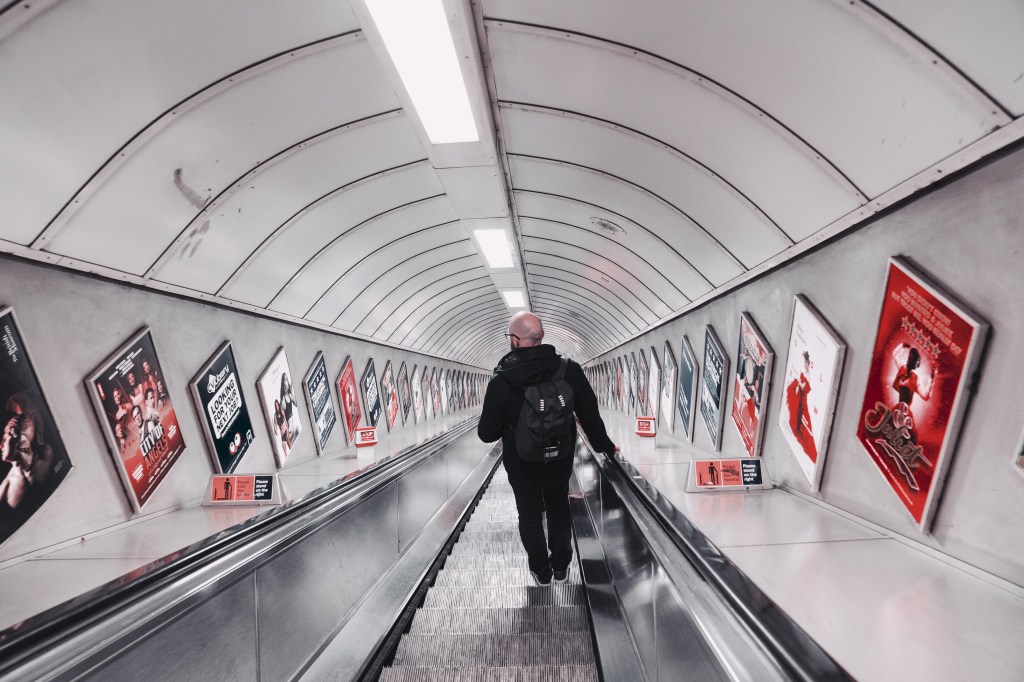
  5. Always keep looking out. Leiter has said that he was never searching for a photo. Instead, the photos will come up to you. By just being observant and moving down the street engaging in the world around you. You may know this idea is popular amongst street photographers, for example, “the decisive moment” by Henri Cartier-Bresson.
Man in Straw Hat, c.1955 
From Wedding as a Funeral, c.1951
Untitled (San Carlo Restaurant at 3rd Avenue and E. 10th Street), 1952 
Orange Umbrella, c.1950 
Remy, 1950s
Subway Window, 1950s

Reference: http://www.1000wordsmag.com. (n.d.). Saul Leiter | 1000 Words. [online] Available at: http://www.1000wordsmag.com/saul-leiter/

O’Hagan, S. (2018). Saul Leiter review – the quiet genius who made the mundane beautiful. [online] the Guardian. Available at: https://www.theguardian.com/artanddesign/2018/jul/17/saul-leiter-review-foto-colectania-barcelona.

http://www.howardgreenberg.com. (n.d.). Saul Leiter – Artists – Howard Greenberg Gallery. [online] Available at: http://www.howardgreenberg.com/artists/saul-leiter?view=slider#4

Henri Cartier-Bresson’s Photography Composition

Henri Cartier-Bresson (1908-2004) was one of the 20th century’s most celebrated portrait and street photographers. His images in the world are famous, and familiar. He has worked with the world’s most popular newspapers and magazines. In fact, he was one among the founders of Magnum Agency, the world’s first independent photography agency.Before Cartier-Bresson started working as a photographer, he studied painting which possibly gave him considerable knowledge of the concepts of composition. Afterwards he switched to other newspapers. He worked primarily as a photographer after 1931, but also as Jean Renoir’s assistant in filmmaking. He turned to drawing after doing all he could in painting, and dedicated it to the last years of his life.

Cartier-Bresson developed the ‘decisive moment’ idea. He established it at a period when photography was still a relatively modern form of art. This means the situations can never arise in the same atmosphere, and the photographer needs to be careful, but still quick and still ready to take a shot. Take a camera, then head out! Observe the world around, and use the crucial moment’s thought to create what he calls a “decisive momet”.

Bicycle // Henri Cartier-Bresson 1932, FRANCE. Hyères.
ERIC. (2017). 5 Henri Cartier-Bresson Photography Composition Lessons. [online] Available at: https://erickimphotography.com/blog/2017/12/16/5-henri-cartier-bresson-photography-composition-lessons/ 

Henri Cartier-Bresson puts a major focus on the importance of preparation and eye-training. Every experience and every picture shot helps affirm this long and continuous cycle of creating a special photographic vocabulary of its own. You don’t even have to bring your camera or phone with you all the time for that. A very powerful way to practise the vision is to imagine continuously how objects around you will look in a picture. A sort of look through the viewfinder without clicking the camera’s shutter button. That is a really fun and informative way to look at the universe at the same time.

Henri Cartier-Bresson 1932, FRANCE. Paris. The Quai St Bernard, near the Gare d’Austerlitz.
ERIC. (2017). 5 Henri Cartier-Bresson Photography Composition Lessons. [online] Available at: https://erickimphotography.com/blog/2017/12/16/5-henri-cartier-bresson-photography-composition-lessons/ 

A photographer and blogger, Eric Kim points out 10 things about Henri Cartier- Bresson’s photography style and how to achieve it.

1. Focus on geometry

2. Be patient

3. Travel

4. Stick to one lens

5. Take photographs of folks

6. Be unobtrusive

7. See the world like a painter

8. Don’t crop

9. Don’t worry about processing

10. Always strive for more

Reference: ERIC. (2017). 5 Henri Cartier-Bresson Photography Composition Lessons. [online] Available at: https://erickimphotography.com/blog/2017/12/16/5-henri-cartier-bresson-photography-composition-lessons/ 

Art (2015). HENRI CARTIER-BRESSON :: THE DECISIVE MOMENTYouTube. Available at: https://www.youtube.com/watch?v=FNKV0TQULMY 

ERIC KIM. (2011). 10 Things Henri Cartier-Bresson Can Teach You About Street Photography. [online] Available at: https://erickimphotography.com/blog/2011/08/22/10-things-henri-cartier-bresson-can-teach-you-about-street-photography/.

ERIC KIM. (2011). 10 Things Henri Cartier-Bresson Can Teach You About Street Photography. [online] Available at: https://erickimphotography.com/blog/2011/08/22/10-things-henri-cartier-bresson-can-teach-you-about-street-photography/.

Wes Anderson’s Centre Composition

The films by Wes Anderson look completely different from the majority of film directors. Every frame is like the cover of an album – beautiful, rich in colours, and with a masterful symmetry. Wes Anderson is the most straightforward director in modern cinema today, but his films are both peculiar and visually informative at the same time.The style of Wes Anderson is a lot more intentional. It seems easy, but it is complicated. The audience enjoys a sophisticated film which feeds information on spoons. His tales are definitely enjoyable, and he is one of the few working directors capable of pulling off major stage settings. Below is a clip of Video essayist Kogonada making some excellent remarks on the artistic obsessions of some of the best formalists in the cinema.

Items that are put in the middle of a frame appear to have greater visual weight. If the point of interest is right in the foreground, what the photographer wants the viewer to pay attention to is very obvious. Imagine your frame where you place objects in and it lies in the middle. Balancing the left and right sides usually provides a feeling of equilibrium. Although going against the law of thirds, highly successful use may often be made of fully symmetrical framing with the point of concern in the exact middle. Many directors are slaves to harmony of their structure and can be incredibly efficient when employed properly.

Inspired by Wes Anderson’s composition style

Reference: kogonada (2014). Wes Anderson // Centered. Vimeo. Available at: https://vimeo.com/89302848 

Ifeanyi, K.C. (2020). ‘Pandora broke my heart’: Tim Westergren, digital radio pioneer, returns to break the music industrial complex. [online] Fast Company. Available at: https://www.fastcompany.com/90494948/pandora-broke-my-heart-tim-westergren-digital-radio-pioneer-returns-to-break-the-music-industrial-complex.

StudioBinder. (2019). Wes Anderson’s Visual Style Explained [Filmmaker Essentials]. [online] Available at: https://www.studiobinder.com/blog/wes-anderson-style/#wes-anderson-style.

Motion Blur Photography

Motion Blur photography is primarily about capturing a scene where a subject is still in motion while everything surrounding the subject is blurred. Using motion blur to produce beautiful pictures from weddings to sports pictures. The trick is understanding the difference between camera shake and motion blur. The former is a particular photographic technique, one that accentuates motion within an picture. Camera shake; however, this occurs when a photographer uses a shutter speed that is too low for the lens’ focal length. It can also happen if the camera is hit involuntarily, and then you end up with images that are less than optimal.

Panning: The concept behind panning is simple, and is taught by practise. You’ll need to familiarise yourself with this by following your camera focus, and then start to click as the shutter is released. This can make panning much simpler if you own a tripod with the right form of spinning handle. If not, holding the camera as steady as possible is crucial when you’re “panning” the subject.

Motion blur lets the shooter express the movement presence within their static pictures. It provides a different outcome than simply freezing a subject. It can convey a period of meaning in an picture, too. If used in a imaginative manner, as in the shots in this post, some incredible effects will result.

Reference: Digital Photography School. 2020. How To Capture Motion Blur In Photography. [online] Available at: <https://digital-photography-school.com/how-to-capture-motion-blur-in-photography/&gt;

Infrared Photography: Filter Emulation

Infrared photography creates certain very distinct effects that make them attractive to the aesthetics. The most striking distinction is the “Oak Effect,” an effect in which leaves absorb light to give them a brilliant white look. This influence is named after Robert W. Wood, the photographer who is considered the founder of infrarot photography. This effect is used for photography of landscapes where it can be used to create realistic colour scenes or high contrast B+W images.

Infrared imaging has a powerful appeal for images in fine art. This seems very dark and otherworldly, with trees of a vivid white or yellow hue, and a red or blue hue of sky. Leaves look frozen over and landscapes in both black and white as well as colour images take on vivid colours.

Aerochrome 1443 Film was a long extinct colour Infrared product made and marketed by Kodak. This is well known for its appearance; the leaves are light red and magenta, and the sky has a deep Blue contrast. In the 1940s, it was used by the military to identify camouflaged areas per aircraft. Then in the 1960s capturing the psychedelic feel of the times became very popular.

First get the fundamentals out of the way; change the contrast, highlight, shadow, colours and turn the Red and Blue channels. Now we are going to continue changing the shades of colour. Now let’s focus on making the bright Red colour like an Aerochrome. We’ll use the Hue / Saturation sliders once more, this time choosing the Red and moving the lever to the left. You will see the red tones become more prominent. Finally, using Color Panel we can further change the Colour. Now our picture begins looking more like an Infrared Areochrome.

Experimenting with Infrared Film Emulation Filter

Reference: Plaza.ufl.edu. 2020. Infrared Photography: A Simple Guide — About Infrared. [online] Available at: <http://plaza.ufl.edu/jenj/about.html&gt;

The Darkroom Photo Lab. 2020. Infrared Film Photography – IR Film How To, Tips & Filters – The Darkroom. [online] Available at: <https://thedarkroom.com/infrared-film-photography/&gt;

Cycling in the UK: A Photographic Collection

Bicycling has become a long-term pursuit that provides both long-term and short-term benefits. It’s an enjoyable practise including being outdoors and away from the less useful activities like tv, monitor and refrigerator. It is a keen interest that not only the young and active should participate, but also children as young as infants as well as the elderly. However, if they have the correct facilities, people with disabilities will do so too. Cycling blends into a person’s lifestyle more easily than many other physical activities as it can be used physically, to go from one location to another unlike, say, swimming that is enjoyable but far more constrained by the time of year and availability.

It’s strange that everywhere I go, there’s always people cycling and regardless the age group. Unlike in my hometown, where it seems to be less regarded as an essential mode for travel and majority of the people would prefer motorcycles rather than a cycle.

One of cycling’s key health benefits is that it strengthens the heart, increases stamina and enhances circulation that decreases the risks from coronary heart disease, one of the major causes of death. A cyclist burns a lot of calories particularly when they’re cycling a good distance or at a moderate to fast speed. Cycling often has the benefit of increasing a person’s metabolism, their internal engine, even after the ride is over. Reducing body weight reduces joint pressure allowing cycling a duel advantage for those suffering from weakened knees.

Street Photography Exploring London: Camden Town

Camden Town is one of the world’s most-visited cities. This is a city that stands out for its uniqueness, home to misfits, writers, singers, tattoo artists and burlesque dancers. Perhaps the 60’s marked the greatest change in the history of Camden Town, when it became a centre of cultural transformation. In reality, rock and psychedelia came into fashion and that was where those movements took place in The Roundhouse. A place where music, arts, politics and youth all gathered. The UK’s biggest bands and musicians started here and Punk, the world most revolutionary fashion movement and subculture, was born here and is still part of Camden’s soul.

Many of Camden Town’s shops sell gothic clothing or are studios for tattoo and body piercing. You’ll find stalls inside the market itself to cater for all tastes, and you’ll find shops and stalls with very unusual products in the main building on the square, where the food stands are.

Reference: Company, T., 2020. A Brief History Of Camden Town. [online] The Camden Watch Company. Available at: <https://www.camdenwatchcompany.com/blogs/the-camden-watch-company/a-brief-history-of-camden-town>&nbsp;

Londoncitybreak.com. 2020. Camden Town – London’S Most Popular Street Market. [online] Available at: <https://www.londoncitybreak.com/camden-town>&nbsp;

Street Photography Exploring London: Brick Lane

One of East London’s most popular streets has to be Brick Lane. Brick Lane is steeped in history and home to some of the best places for dining in London, not to mention shops and street art. It has a fascinating history and is one of the most popular places to visit today in the East End. The street was originally called Whitechapel Lane; it is believed to have been renamed because brick and tile makers who set up shop in the street in the 15th century used local soil.

Brick Lane is also named by Londoners affectionately Banglatown. This has been one of the most popular places for Bangladeshi immigrants since the late 20th century, especially Bengalis from the Sylheti area. In London, the street is the place to go for a curry, particularly if you want to try traditional and authentic cooking rather than high street curries.

Brick Lane is home to a vibrant culture of artists too. The graffiti is especially worth watching out for , street art is celebrated here instead of being cleaned off immediately! There are also several small galleries around Brick Lane and its surrounding streets worth a visit.

Reference: Ramaswamy, C., 2020. Brick Lane In The 80S: Before It Became Banglatown. [online] the Guardian. Available at: <https://www.theguardian.com/cities/2017/mar/06/brick-lane-in-the-80s-before-it-became-banglatown&gt;

(Brick Lane History – Visit East London Street Markets, 2020) East London History. 2020. Brick Lane History – Visit East London Street Markets. [online] Available at: <https://www.eastlondonhistory.co.uk/brick-lane-east-london/&gt;

Editing( with reference to Adobe Lightroom)

Adobe Lightroom provides a range of tools that are customised to the contemporary photographer’s needs. Lightroom encompasses much, if not all, of the resources you will most definitely need for image editing.
Lightroom, though, is much more than a photo editor or app for image editing. Lightroom allows you to download, handle, arrange and locate your images. In effect, Lightroom, combined into a single application, is media processing and photo editing.

When you capture raw images, first import your pictures into Lightroom as the initial step in your image management method. Lightroom is a raw file editor, so Adobe Camera Raw is not required. Even, as you import, you’ll be arranging your digital photography because of Lightroom’s photo management capability.

Lightroom is ideal for most simple photo editing, including cropping, white balance, composition, histogram changes, colour curves, black and white transfer, spot replacement, red eye corrections, gradients, contextual improvements, sharpening, noise reduction, lens profile corrections, distortion, and saturation. If you’re comfortable with Adobe Camera Raw, it will look very familiar to develop a photo in Lightroom.

Matte Effect filter
Using curves to balance exposure
copying settings from the photo
Pasting the settings in the selected photos
Black and white filter effect
Using the Black and White panel
Adding grain to create a film effect
Kodachrome filter effect
Using curves to balance highlight
Sharpening the image
Design a site like this with WordPress.com
Get started